Friday, May 8, 2009
Making Latex Clothing
Getting Started
How to begin making your own latex clothing
First of all you will need a couple of things before you can start making your own latex clothing at home. Here is a list of the things you need. The cost of the following tools and 5 meters of latex sheeting should be around 80 euro or 100 US dollar.
If you would like to read more about the different latex making accessories then click on the links.
1. Acrylic / Plexiglass sheetwhich you can put on your working table to cut your latex sheetings on.It doesn´t have to be a thick one, you will not cut through it.
2. Rotary cuttermakes it easy, fast and presicely for you to make cut outs of your latex sheetings
3. Rulersto make the patterns for your latex garment.
4. Pencils, Paintmarkers etc.for your drawings on paper and markings on the latex sheeting.
5. Scissorsto make cut outs on latex sheeting/clothes.
6. Brush or cotton bud etc.to apply the glue on the latex sheeting.
7. Rubber cementstrong adhesive to glue latex sheeting together and to create a bond between latex and cloth.
8. Natural latex milkstrong adhesive to glue the very thin latex sheeting together.
9. Mineral spirit or Heptan and a piece of clothto clean the parts of the latex which should be glued together and to clean of pencil marks etc.
10. Measurement tapeto get your right measurements.
11. Latex sheeting5 meters of 0.3 - 0.40 mm will be a good start.
http://makinglatexclothing.com/
Sunday, April 26, 2009
diy spreader bars
taken from: http://kinkytinker.tribe.net/thread/eaa52281-abff-44ba-beac-b5e593e0549d
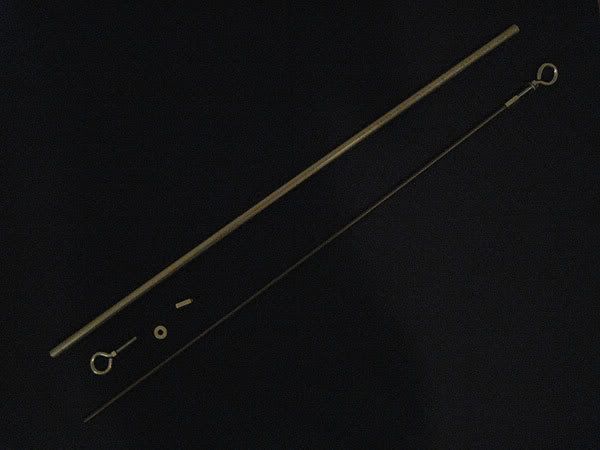
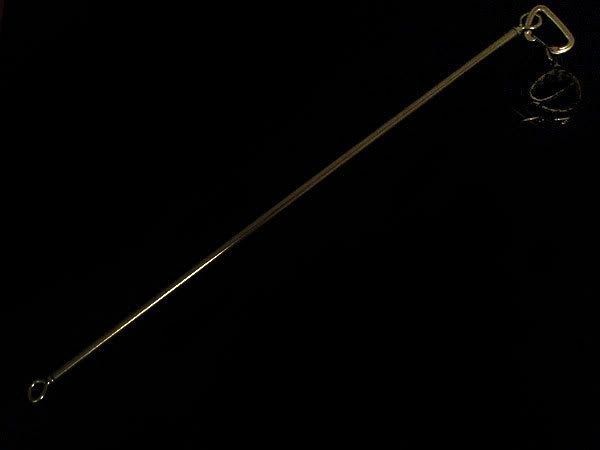
OK, so I'm one of those people that sees a $55 spreader bar and says I bet I could make that for < $20. Thanks to the Hollywood Home Depot guy for the electrical conduit suggestion and free cut. Haven't tested it yet, but will report back if revisions are required. PARTS i154.photobucket.com/albums/...arts.jpg- 1 piece of 1/2" (inner diameter) galvanized electrical conduit note: Dry fit your parts to determine the length. For me 39.5" was perfect. - 1 quantity 3/8" x 36" length of threaded rod note: Verify that the thread spacing matches the eyebolts. - 2 quantity 3/8" x 4" eyebolts - 2 quantity 3/8" nuts (these came with the eyebolts) - 2 quantity 3/8" coupling nuts note: Again verify the threading is compatible with your eyebolts/threaded rod. - 2 quantity 1/2" inner diameter washers (the ones I found had an outer diameter of 7/8") note: If the conduit is too short you can always add more washers. - black spray paint (optional) - acrylic clear coat (optional) ASSEMBLY/CUT TIME 10-15 minutes DIRECTIONS 1. Do a dry fit to determine the length of conduit you need. Screw the 3/8" (non-coupling) nut all the way up both eyebolts. Add the washers to each eyebolt. Screw the coupling nuts on both eyebolt, leaving ~ half of nut free for the threaded rod. Screw in the threaded rod between both coupling nuts. Now measure the space between the washers to determine the length of conduit you will need. 2. Cut the conduit to length. You may need to ream out the end of the conduit on the cut end if the left over metal bends in slightly. 3. Paint/clear coat the conduit if desired. I kind of like the industrial look, although I might clear coat. 4. Unscrew one of the eyebolts from the coupling nut and remove the washer. 5. Slide the conduit over the open end of the threaded rod/coupling nut. 6. Screw the washer and eyebolt back into the coupling nut. You can add extra washers (or less optimally unscrew the nut to a lower position on the eyebolt) if you accidently cut your conduit too short. 7. Restrain away. FINISHED PRODUCT i154.photobucket.com/albums/...shed.jpg
posted by:
Subscribe to:
Posts (Atom)